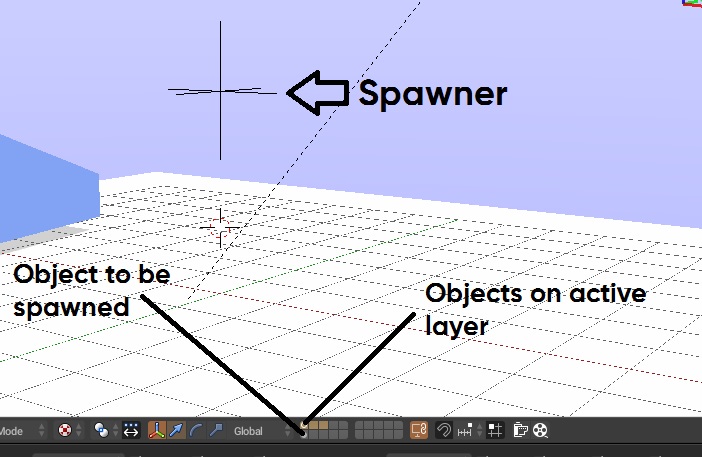
When you are spawning objects, the object which spawns it must be on active layer. And the object that is going to be spawned must be on invisible layer. In simple words, if you are spawning an enemy keep it on an invisible layer and keep the the spawner on active layer like this.
Spawning objects are easy lol. Ok first things first, add an Empty by pressing Shift+A. You can add any empties, I'll stick with Plain Axes.
Place the empty wherever you want, I'll move the empty to 3 on Z axis.
Now added a sensor, I'll added a keyboard sensor and press a key. Add Edit Object actuator and on the Object, set the object you want to spawn. If you want your object to last forever (until the game runs or until some other object destroys it), Leave the Time: 0.00 as it is. Don't forget to connect the actuator to the sensor, only then it works 😊.
Now run the game and trigger the keyboard by pressing the key u set previously.
If you're wonder what those Linear Velocity: X: 0.00 | Y: 0.00 | Z: 0.00 and Angular Velocity: X: 0.00 | Y: 0.00 | Z: 0.00 does... It's just nothing but velocity created upon creation of that spawned object. When you spawn the object which was in the invisible layer, it just pushes/spins for an instance when spawned.
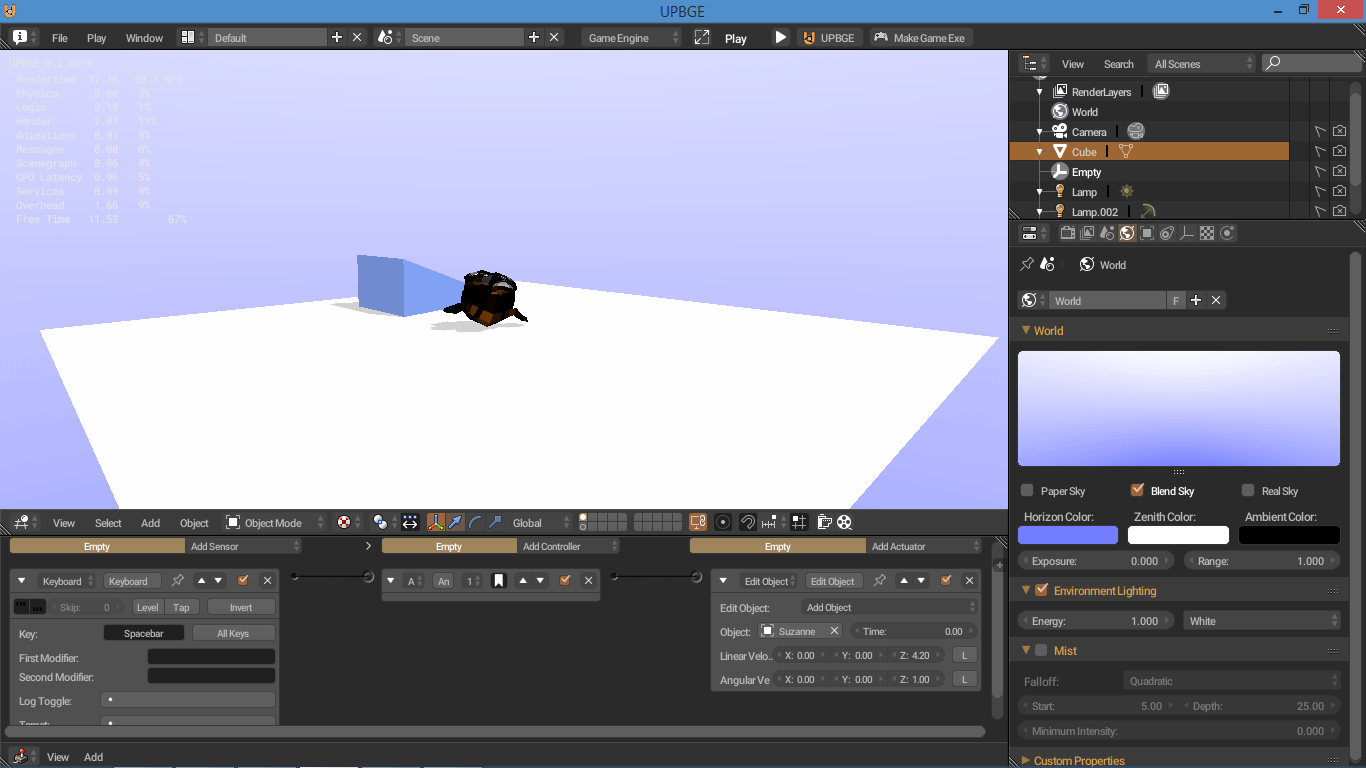
Here the monkey object's Physics Type is set to Rigid Body. And btw download the project file here project file, Mirror Link 2
This can be used when