We'll be checking if the object the ray is cast upon is a "good" or "bad" character. The ray touches the charecter and if the character is "good", we won't be able to shoot it. If "bad", we'll kick its ass.
We're going to setup up a simple First Person Shooter type player setup. If you know how to make the FPS setup you can skip this part or go on. Fire up the engine, select the cube or add one if it's not there and scale it's local Z axis to 3. Ayo also turn on snapping if you want the position/rotation/scale to be in perfect transformation instead of 3.42495 blah blah. Also set the snapping type to Increment.
After setting the scale to 3, apply the scale by pressing Ctrl+A and choose Scale. Now the scale must be back to 1. This can avoid some problems with scaling. Now jump to logic editor and make the character move. Oh since our character is a Character, we must set the phyiscs type to Character. And set the Collision shape to Capsule. Almost every FPS game has this type of setup for collision.
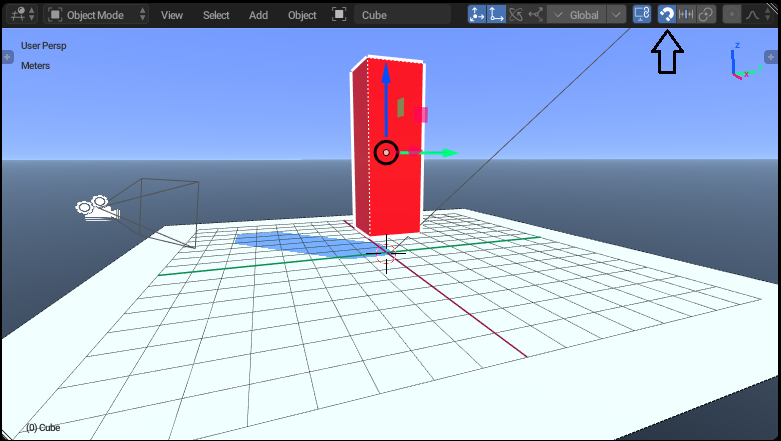
Now for the camera view, you need to have your character and the camera like this.
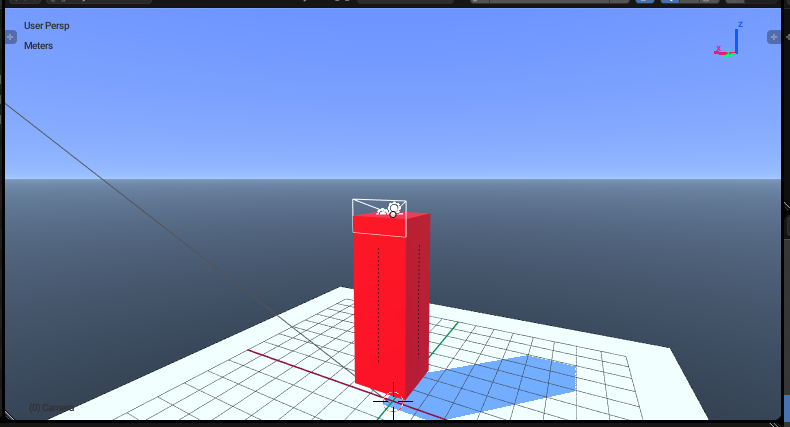
The camera works this way: When you move your mouse left and right, you character turns left and right. When you move your mouse up the down, your camera goes up and down. This is how most of the FPS games work.
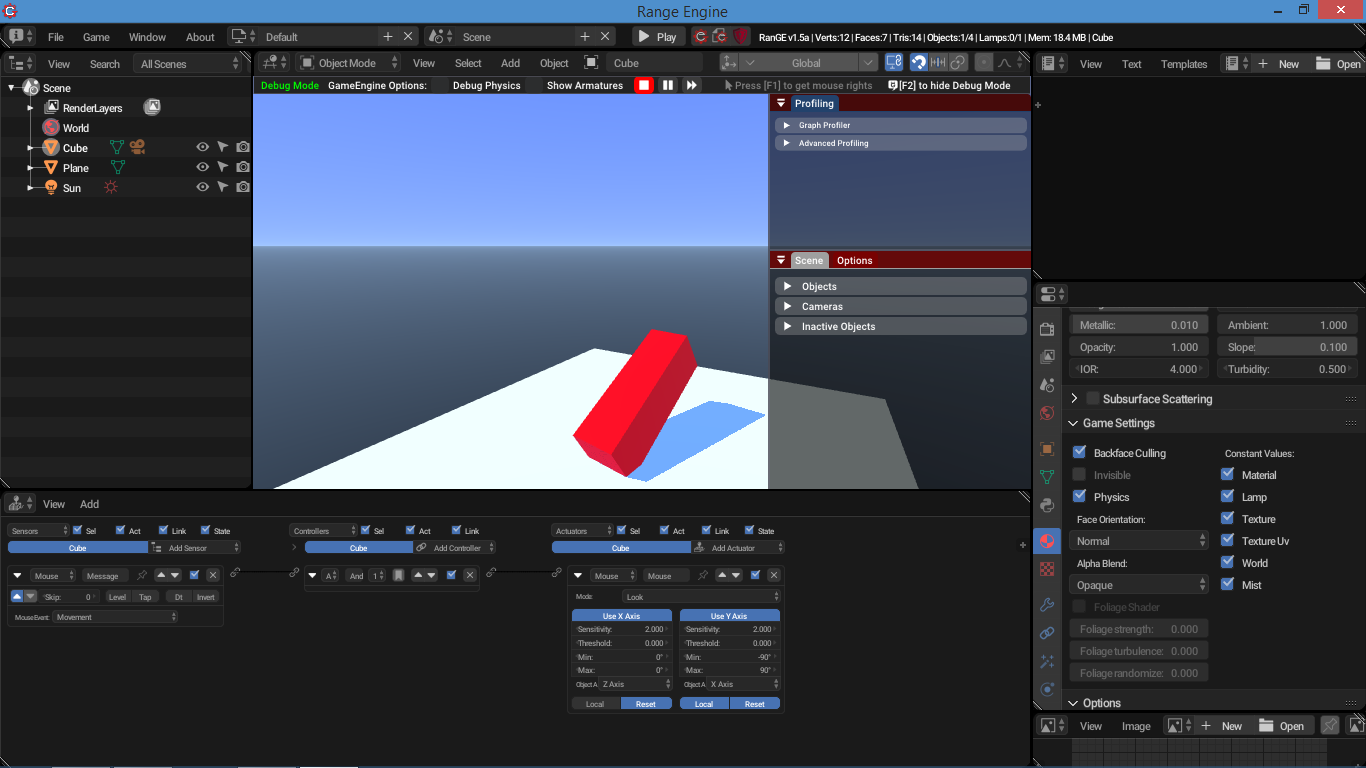
For the character, add a Mouse sensor and set the Mouse Event to Movement Turn on true level triggering, only then the camera move every frame you move your mouse or it won't work as expected. Add a Mouse actuator, yes an actuator and change it's Mode to Look.
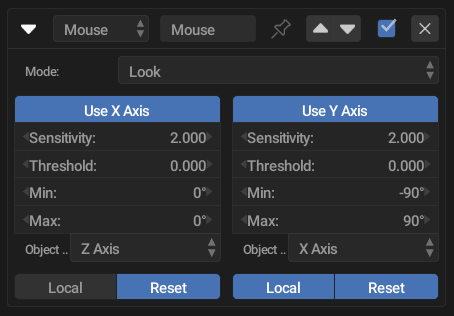
This actuator tells that if the user moves the mouse on the X axis then the rotation of the object's axis will be Z axis. If the user moves the mouse on the Y axis then the rotation of the object's axis will be X axis. And yeah you can disable them too. Since this actuator is for the character, disable Use Y axis or you character will be looking up and down like this lol.
Now for the camera, wait wait. Instead of adding the logic bricks manually, you can copy them. Select the camera and then the character, in the 3D View go to Object -> Game -> Copy Logic Bricks. Alternatively you can press the spacebar and type Copy Logic Bricks to Selected. Nice.
Ay the mouse is annoying, right? Uncheck the Mouse Cursor by going to Render -> Display -> Mouse Cursor.

Yea you can also set custom cursor image from Range Engine 1.5a! Now that our player setup is over let's move to good boi bad boi setup.
Add a cube, create a property and name it as good. Duplicate it by pressing Shift+D, yes you gotta keep the object seperate and rename its property as bad. Okay rename the objects as good and bad too. Property with good will be renamed as good and vice versa for bad. This is just to keep them organized. You can set the phyiscs type to Character or leave it as it is. Not a problem.
For the raycasting logic select the camera, add Ray sensor and set the Range between 10 or 20 for now. In the 🎮 Property field, type bad and add a Message actuator. In the Subject field of that message, type bad_die. If you know what I'm doing that's good or lemme explain: If the ray sensor detects an object with that "bad" property, well send a message to that "bad" object as "bad_die". And that if that bad object recieves a message as "bad_die" the object ends itself.
Now select the bad object, add a message sensor type bad_die add a Edit Object actuator, set the Edit Object to End Object. Yea connect them and run the game. Btw download the project file here yo!
If "bad" object doesn't disappear but when you move the camera around the it does, the reason behind the quite tricky. The orientation of the camera is faced downward when it's X axis is 0.
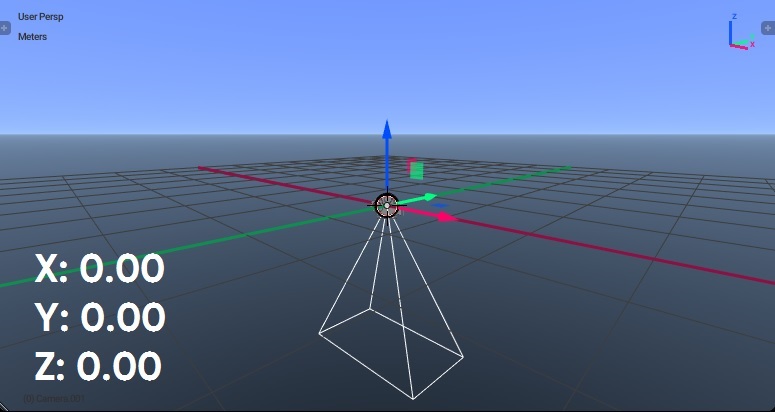
And when you rotate the camera to face forward by setting it's X axis to 90, the ray goes upward as the camera's local positive Y axis is facing up.
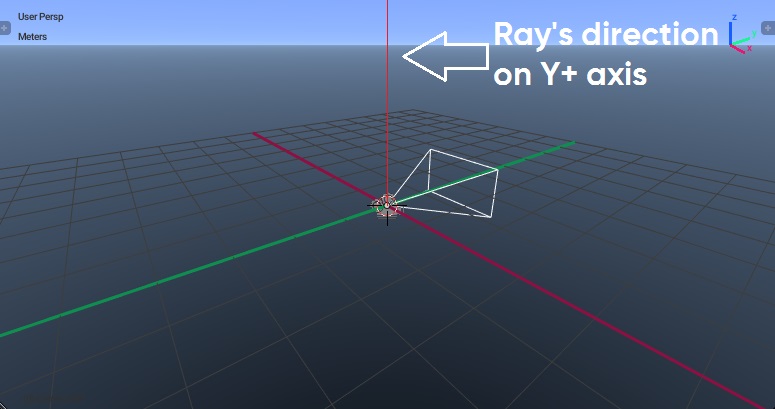
By default ray goes in positive Y axis. So the solution is to set the axis of the camera's ray to -Z axis. And it should work like it should.
Have a nice day bruh!